Microsoft® Outlook® 2003 Step-by-step Instructions
This page contains step-by-step instructions for Sensical.net customers on how to setup email accounts in Microsoft® Outlook® 2003. You should read the general email instructions from the Sensical.net FAQ first.
Contents
| 1. | Create a new IMAP account |
|---|---|
| 2. | Create a new POP account |
| 3. | Review (changing and/or removing) existing accounts |
Create a new IMAP account in Microsoft® Outlook® 2003to top
-
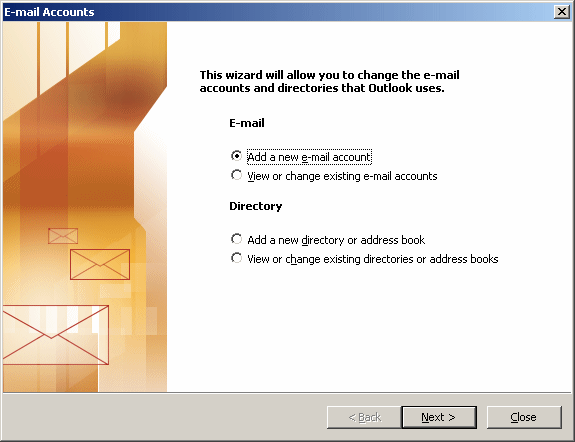
From Microsoft® Outlook® 2003 click on the Tools menu and select the Email Accounts... option and the following dialog will be displayed. Select Add a new e-mail account then click Next > as per the picture below.
-
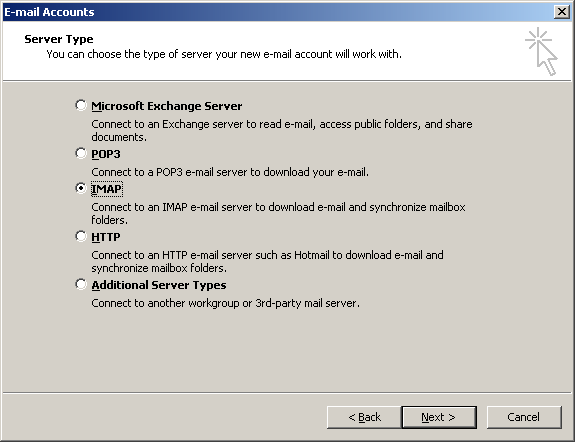
Select the IMAP option as per the picture below, then click the Next > button.
-
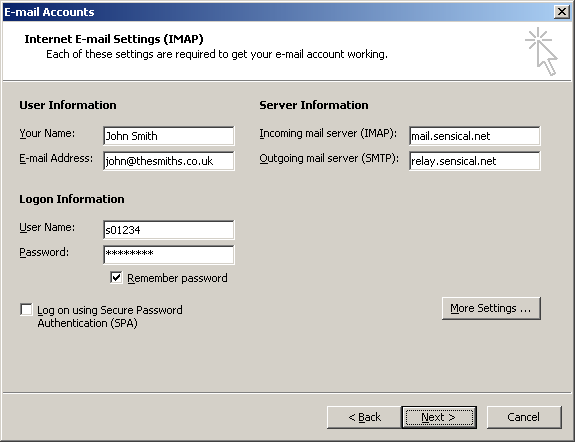
Complete the following information as per the picture below then click the More Settings... button.
Substitute your email address in the E-mail Address field which is in the form <anything>@<domainname>. In the following example the customer, called John, is using the thesmiths.co.uk domain name.
Substitute your Sensical.net username and password in the User Name and Password fields. You will have received these details in your Sensical.net Account Setup email.
-
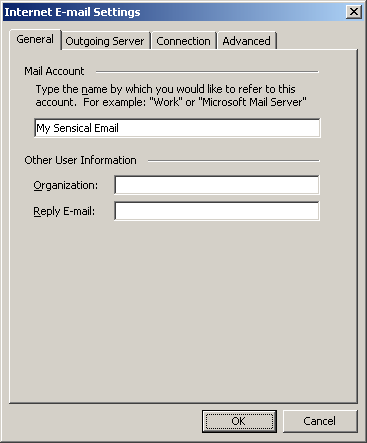
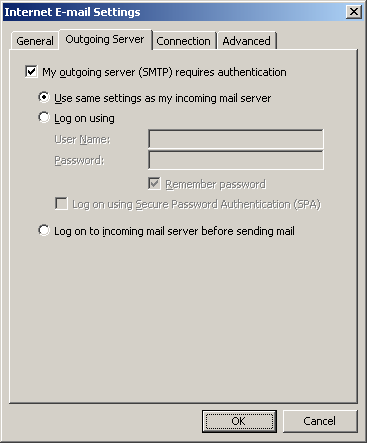
Enter any recognisable name for this email account as per the picture below and then click the Outgoing Server tab.
-
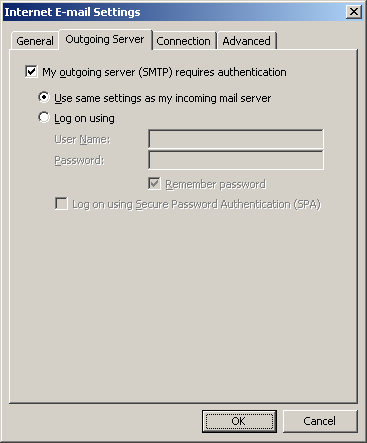
Ensure you use the settings as per the picture below and then click the Connection tab.
-
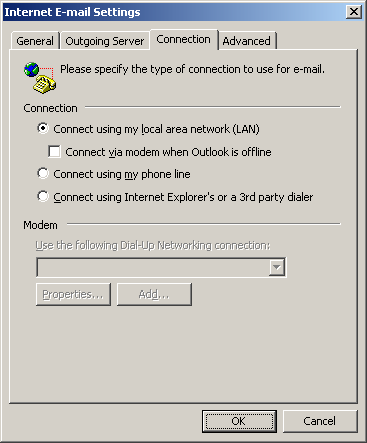
You should not normally need to alter any settings in the DBConnection tab. Click the the Advanced tab.
-
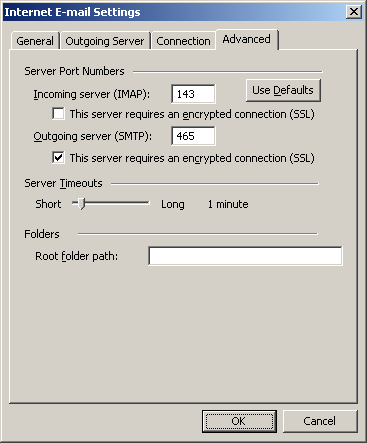
Ensure you use the settings as per the picture below and then click the OK button, then click the Next > button, then click the Finish button.
-
Your new email account will appear automatically in Outlook®'s Folder List. Test your new account by sending an email to yourself. Also see how to review (including changing and/or deleting) exsiting accounts.
Create a new POP account in Microsoft® Outlook® 2003to top
-
From Microsoft® Outlook® 2003 click on the Tools menu and select the Email Accounts... option and the following dialog will be displayed. Select Add a new e-mail account then click Next > as per the picture below.
-
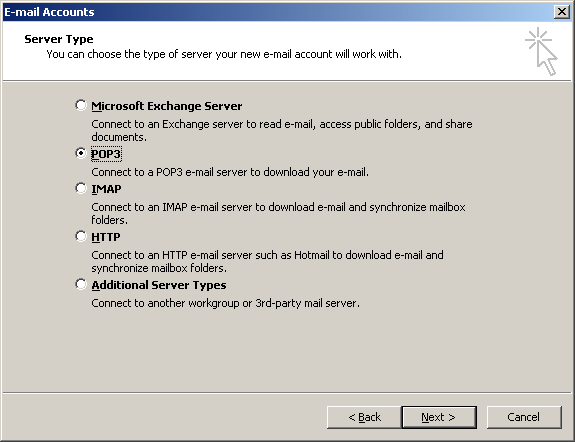
Select the POP option as per the picture below, then click the Next > button.
-
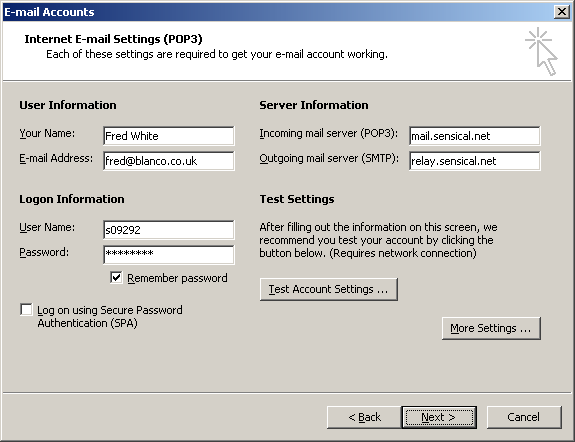
Complete the following information as per the picture below then click the More Settings... button.
Substitute your email address in the E-mail Address field which is in the form <anything>@<domainname>. In the following example the customer, called Fred, is using the blanco.co.uk domain name.
Substitute your Sensical.net username and password in the User Name and Password fields. You will have received these details in your Sensical.net Account Setup email.
-
Enter any recognisable name for this email account as per the picture below and then click the Outgoing Server tab.
-
Ensure you use the settings as per the picture below and then click the Connection tab.
-
You should not normally need to alter any settings in the DBConnection tab. Click the the Advanced tab.
-
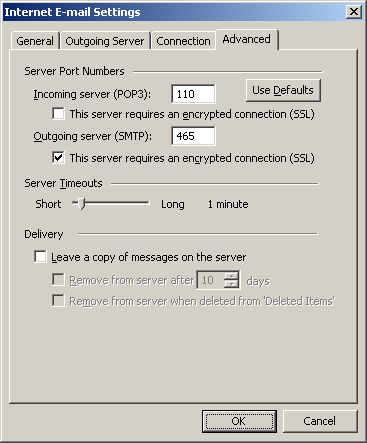
Ensure you use the settings as per the picture below and then click the OK button, then click the Next > button, then click the Finish button.
-
Your new email account is now setup. Test your new account by sending an email to yourself. Also see how to review (including changing and/or deleting) exsiting accounts.
Review existing accounts in Microsoft® Outlook® 2003to top
-
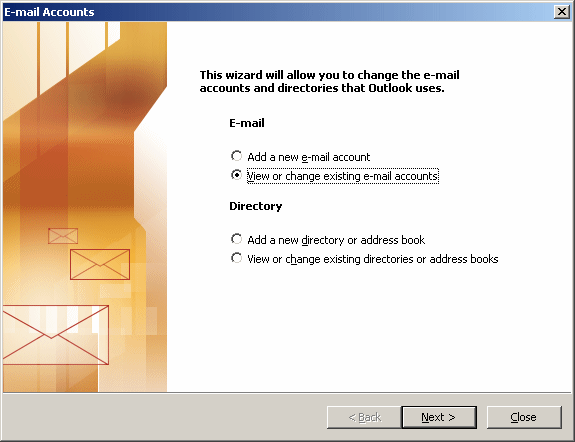
You can review your email accounts in Microsoft® Outlook® 2003 at any time by clicking on the Tools menu and select the Email Accounts... option and the following dialog will be displayed. Select View or change existing e-mail accounts then click Next > as per the picture below.
-
You will then be presented with a list of your email accounts as per the picture below. You can edit existing accounts by selecting the account name in the list then clicking the Change... button. Then follow the instructions from step 3 for creating a new IMAP email account or a new POP email account.
You can also remove unwanted accounts by selecting the account name in the list then clicking the Remove button and then clicking the Yes to confirm.
When you have finished reviewing your email accounts click the Finish button.
