Apple® iOS® IMAP Email Step-by-step Instructions
This page contains step-by-step instructions for Sensical.net customers on how to setup email accounts on Apple® device including iPhone® and iPad®. These instructions have been optmised for iOS 7.0, but should be suitable for other iOS versions. You should read the general email instructions from the Sensical.net FAQ first.
Create a new IMAP account
-
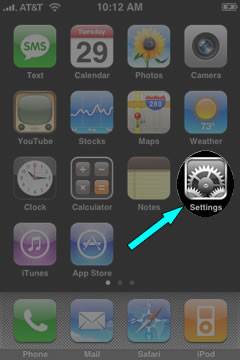
Click on the Settings icon on the homepage as per the picture below.
-
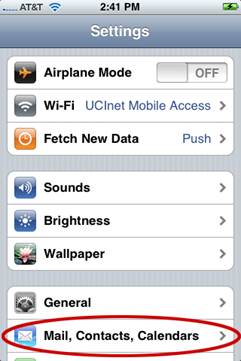
Select the Mail, Contact, Calendars option in the list as per the picture below; you may have to move down the page a bit to see it.
-
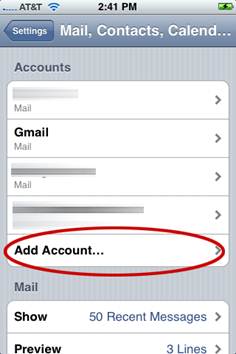
Select Add Account... as per the picture below.
-
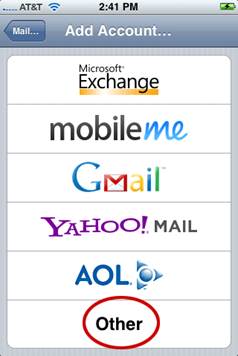
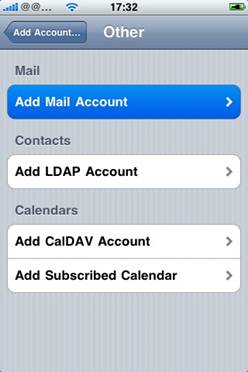
Select Other as per the picture below.
-
Select Add Mail Account as per the picture below.
-
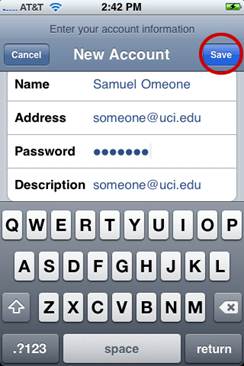
The following scren will now be diplayed. Complete the following information as per the picture below:
- Name: Your name. Email sent using this email account will appear to be from this name. For example, enter a personal name such as John Smith or the name of a business department such as My Company Accounts Department.
- Address: Your email address. This must be a valid email address as configured by Sensical.net. Emails will be sent from this addres and any replies will come to this address.
- Password: Your Sensical.net password; as assigned to the above Sensical.net username.
- Description: The description of this email account; enter something to identify this account from others on your device, for example your email address.
Then click the Next button.
-
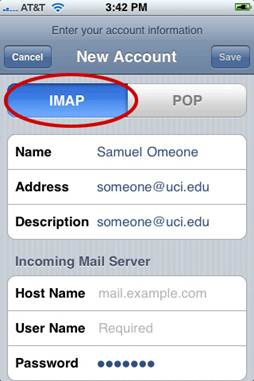
The device will display Looking up information for a short while, after which you will be presented with a screen asking for additional account information.
Ensure the IMAP button is pressed as per the picture below.
-
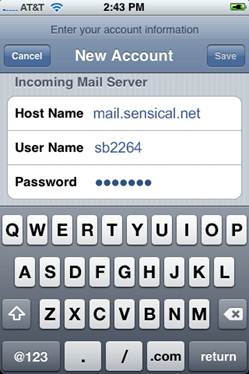
Scroll down if necessary and ensure that the following settings are correct under the Incoming Mail Server section as per the picture below:
- Host Name: Must be set to mail.sensical.net
- User Name: Your Sensical.net username, for example s12345
- Password: Your Sensical.net password; as assigned to the above Sensical.net username.
-
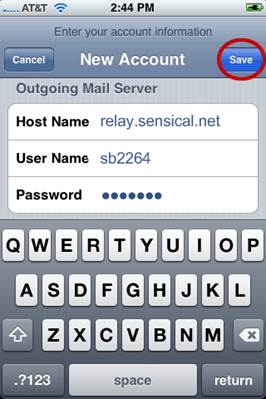
Scroll down further if necessary and ensure that the following settings are correct under the Outgoing Mail Server section as per the picture below:
- Host Name: Must be set to relay.sensical.net
- User Name: Your Sensical.net username, for example s12345
- Password: Your Sensical.net password; as assigned to the above Sensical.net username.
Press the Next button once you have entered all the information.
-
The device will display Verifying IMAP account Information for a short while.
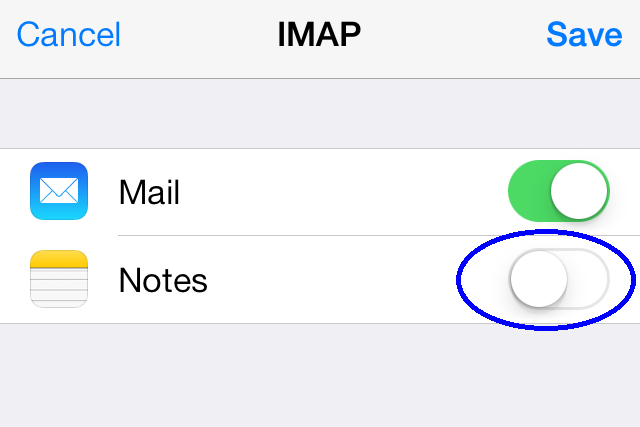
If everything is working correctly then you will see the following picture. If you receive any error message then double-check the information was entered correctly in the preceding steps.
De-select the Notes option and levae just the Mail option selected as per the picture below.
Click Save.
-
That's it. You should see the new email in your email account list.
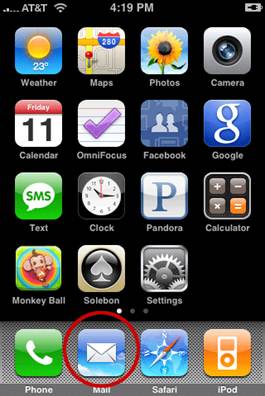
Click the home button to return to your home screen.
You can now access your email by clicking the Mail icon from the home screen as per the picture below.
Test it works both sending and receiving. Check both because they use different settings. If you have any trouble please contact our support team.
Apple and iPhone and iPad are trademarks of Apple Inc., registered in the U.S. and other countries. IOS is a trademark or registered trademark of Cisco in the U.S. and other countries.